
What to know before selecting a configuration
- Room dimensions: Measure the length and width of your room to determine the microphone and speaker coverage requirements.
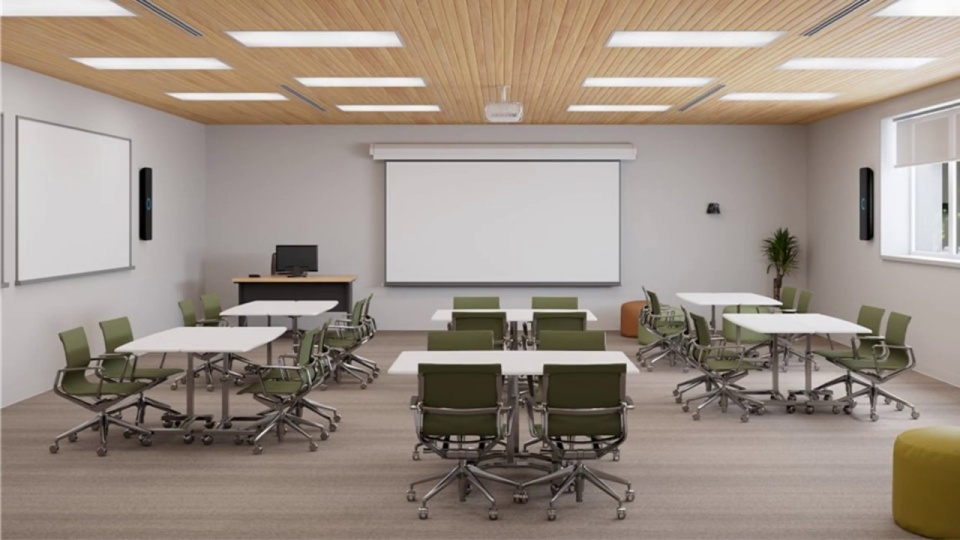
- Talker location: Understand how the room is being used and where people typically speak. Is the room mainly used for presentations with talking at the front? Or do participants sit around a table? This will help determine HDX component placement and the best configuration.
- Audio priority — speaker output vs. microphone pickup: Determine if the room is used primarily for in-room audio, clear speech capture or both. Microphone pods can be added for extra coverage, but make sure you consider the audio priority when deciding where to place the HDX components.
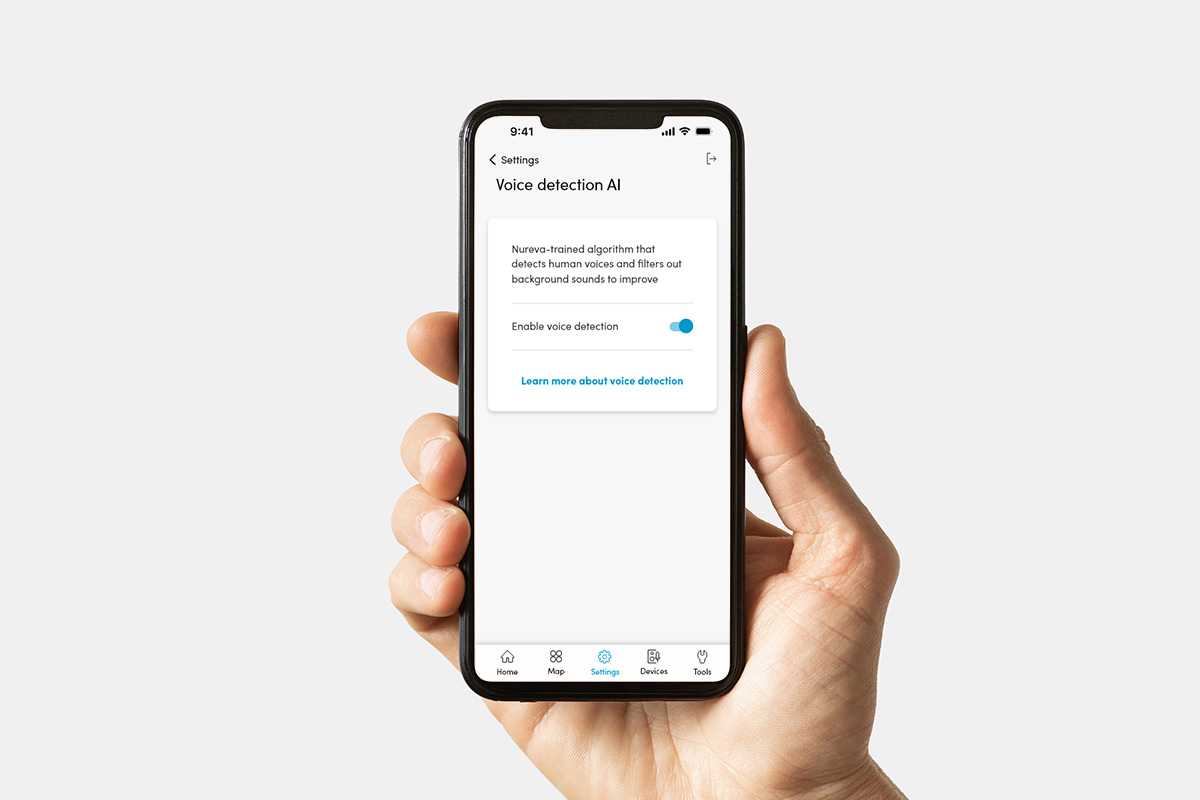
- Room acoustics: Understand the room acoustics, with reverberation and background noise, to evaluate the best location for the HDX system components. Get the Nureva App for iOS and perform an acoustic check using the microphone on an iPhone® or iPad® device. Learn more about acoustic check.
Recommended configurations
The configuration table below lists the recommended maximum room size and features available for each HDX configuration.
Note: If you require features available only with larger configurations — such as 3D sound location data, camera tracking or Adaptive Voice Lift — you can install a larger configuration in a smaller room, provided mounting recommendations are followed. This approach delivers enhanced audio performance and access to those advanced features. For example: If you have a room that’s 30' x 30' (9.1 x 9.1 m) or smaller and require camera tracking, simply add a microphone pod.
 |
 |
 |
 |
 |
|
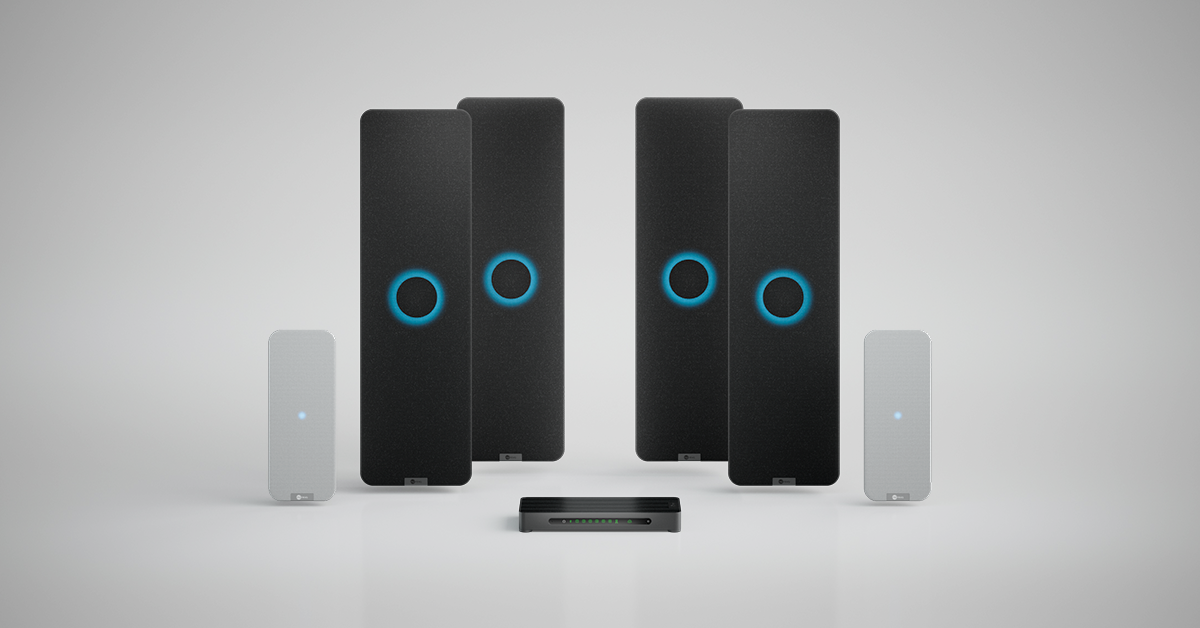
| Configuration | 2 bar | 2 bar + 1 pod | 4 bar | 4 bar + 1 pod | 4 bar + 2 pod |
| Max room size | Up to 30' x 30' (9.1 x 9.1 m) |
Up to 35' x 40' (10.7 x 12.2 m) |
Up to 40' x 60' (12.2 x 12.2 m) |
Up to 40' x 60' (12.2 x 18.3 m) |
Up to 40' x 60' (12.2 x 18.3 m) |
| Camera tracking | |||||
| Adaptive Voice Lift | |||||
| 3D sound location data |
Note: Adaptive Voice Lift is available only with the 4 bar + 2 pod configuration.


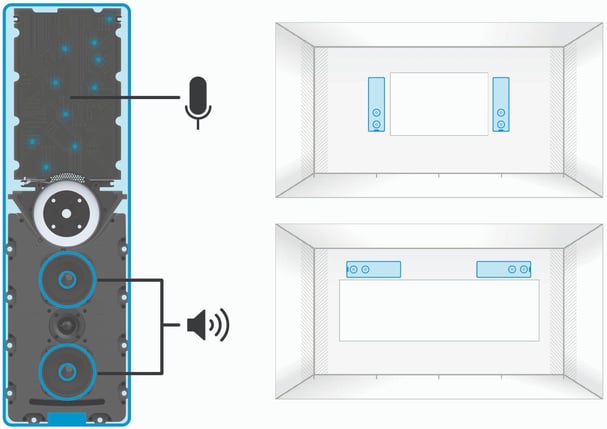


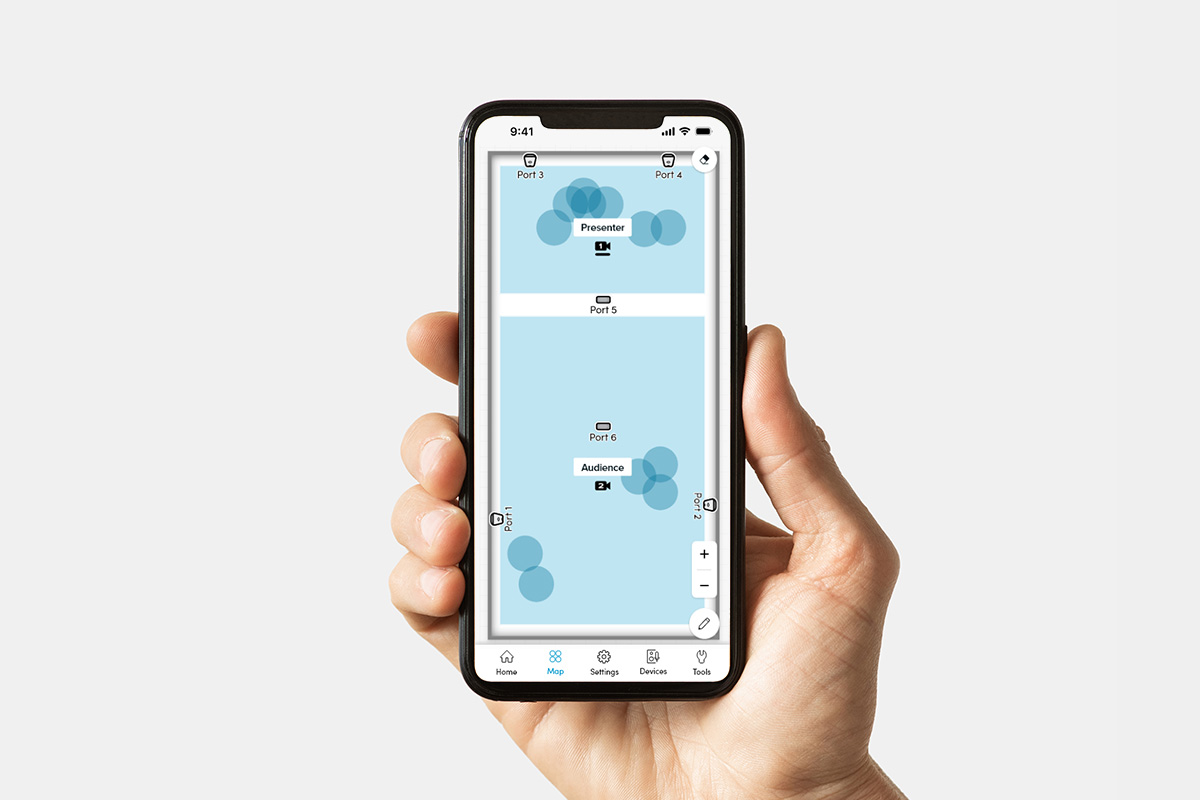
 HDX 2 bar: room layouts


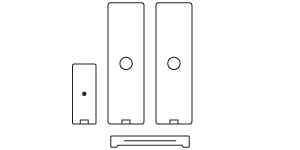
 HDX 2 bar + 1 pod: room layouts


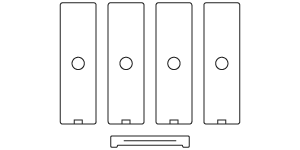
 HDX 4 bar: room layouts


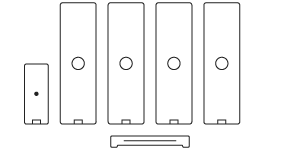
 HDX 4 bar + 1 pod: room layouts


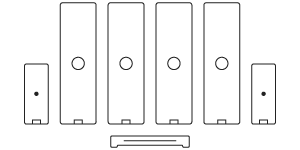
 HDX 4 bar + 2 pod: room layouts


Installation steps
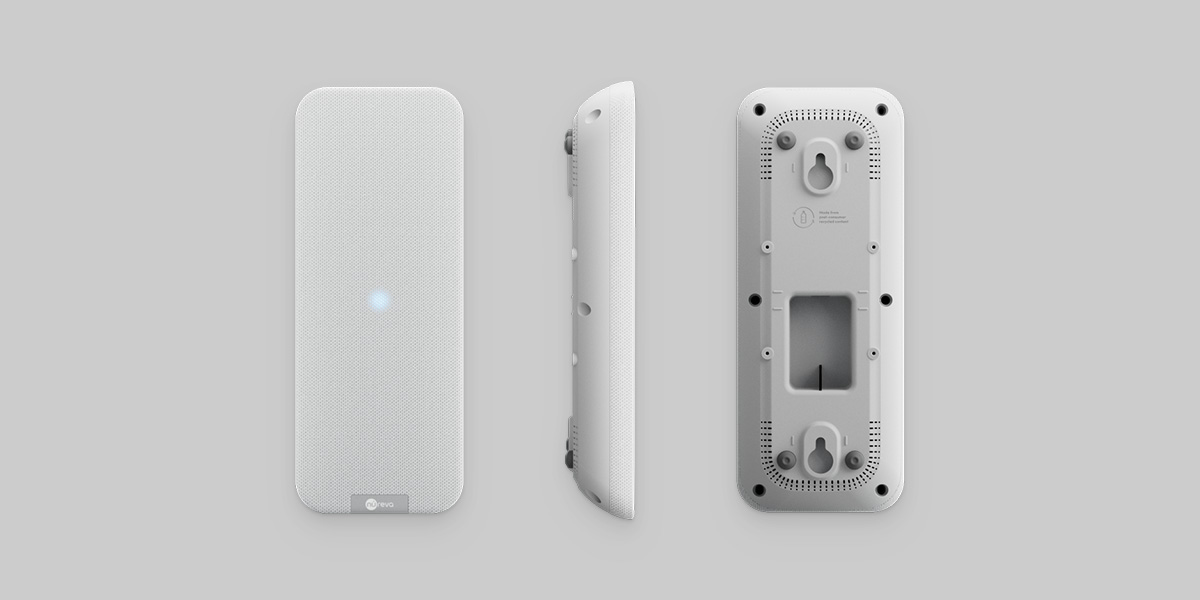
The audio bar can be installed with the mounting bracket provided in the box. It also supports standard VESA mounting for additional flexibility.
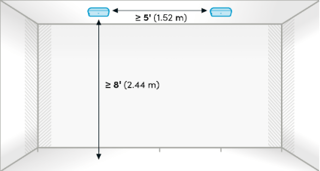
Note: Ensure you review Audio bar placement requirements before installation.
|
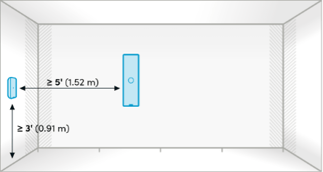
1. Plan the mounting location Select an appropriate location on the wall for installation. |
 |
|
2. Choose orientation A: Vertical orientation: The mounting squares on the audio bar come pre-attached for vertical mounting. |
 |
|
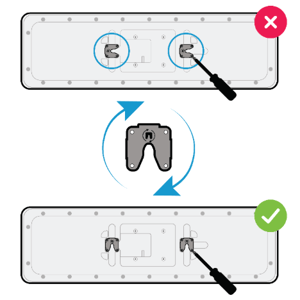
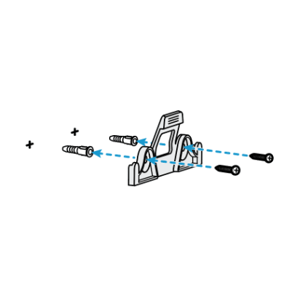
B: Horizontal orientation: Hardware adjustment is required to install the audio bar in the horizontal position:
|
|
|
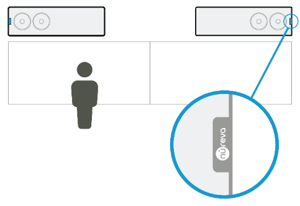
Note: For horizontal orientation of two audio bars on the same wall, ensure the speakers are facing away from each other. The speakers are in the lower section of the audio bar, closest to the Nureva logo. |
|
|
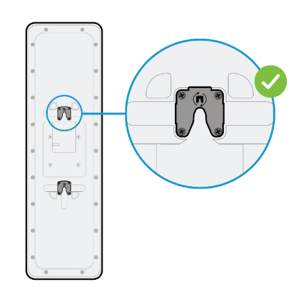
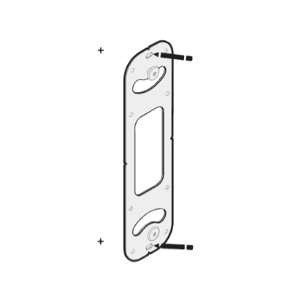
3. Mark for installation Position the mounting bracket on the wall and mark the hole positions with a pencil or pen. |
 |
|
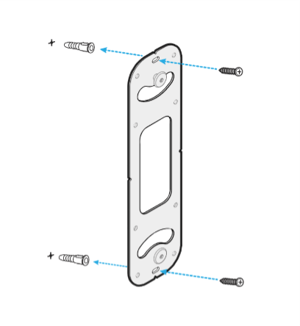
4. Install the mounting bracket Drill the marked holes, insert wall anchors and then position the mounting bracket and securely screw it to the wall. |
 |
|
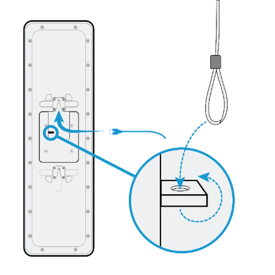
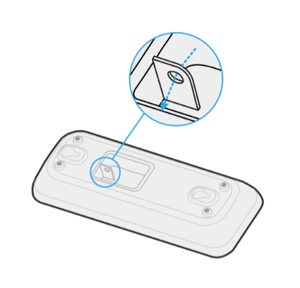
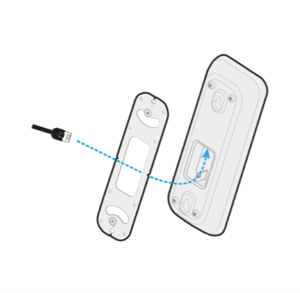
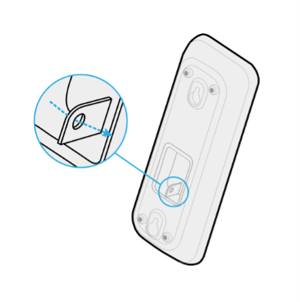
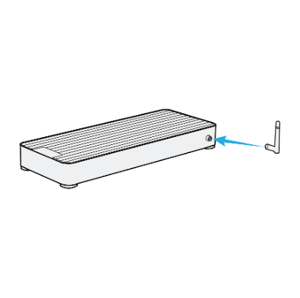
5. Route the Ethernet cable Run the Ethernet cable to the mounting area and plug it into the back of the audio bar Tip: For extra security, thread the security wire through the small metal frame hole on the back of the audio bar — located in the divot. |
 |
|
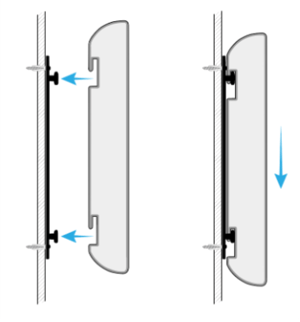
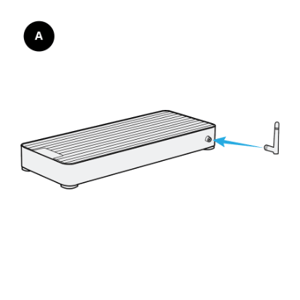
6. Mount the audio bar Align the audio bar with the mounting bracket and slide it into place until you hear it click. Tip: For cleaner cable management, cables can be tucked and hidden behind the audio bar. |
 |
|
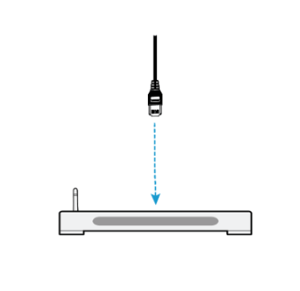
7. Connect to system hub Connect the audio bar to the system hub with the Ethernet cable. |
 |


Installation steps
The microphone pod can be installed on the ceiling or on the wall with the mounting bracket provided in the box. It also supports standard VESA mounting for additional flexibility.
Note: Ensure you review Microphone pod placement requirements before installation.
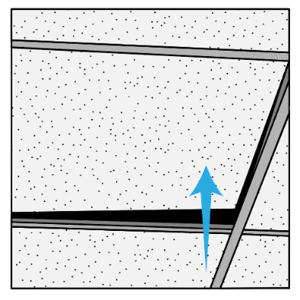
Ceiling mounting
Note: T-bar clips allow the mounting bracket to be fixed to the main tees and cross tees of a T-bar (suspended) grid ceiling.
|
1. Plan the mounting location Choose a suitable spot on the ceiling for optimal audio pickup. |
 |
|
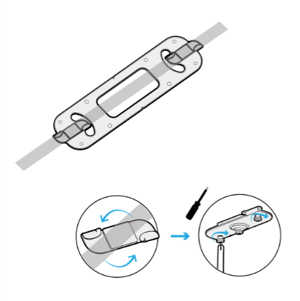
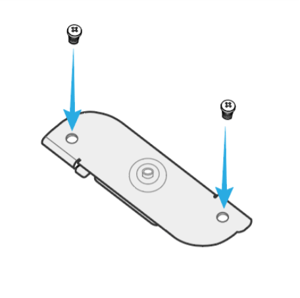
2. Attach T-bar clips to the mounting bracket Retrieve the T-bar clips from the packaging.
|
|
|
Place the two screws into the side holes of the clip, but do not fully tighten them yet. Final tightening will occur in a later step. |
|
|
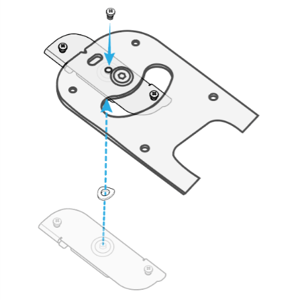
Add the wave washer to the center of the T-bar clip, then place the mounting bracket on top of the T-bar clip and tighten the screw to the washer area. Repeat the steps above for the T-bar clip on other side. |
|
|
3. Prepare the mounting spot on the ceiling T-bar Position a ladder under the mounting spot. Lift and move the ceiling tiles aside to access the T-bar. |
 |
|
4. Affix the mounting bracket to the T-bar Position the mounting bracket over the T-bar. Slide each T-bar clip so it fits over both edges of the T-bar. Tighten both screws to secure them in place. |
 |
|
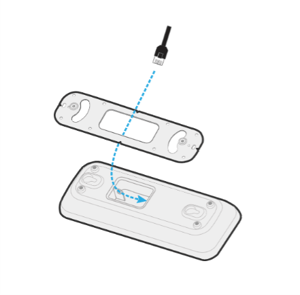
5. Route the Ethernet cable Run the Ethernet cable to the mounting area and plug it into the back of the microphone pod. Tip: You may need to notch the ceiling tile to allow it to lay flat. |
 |
|
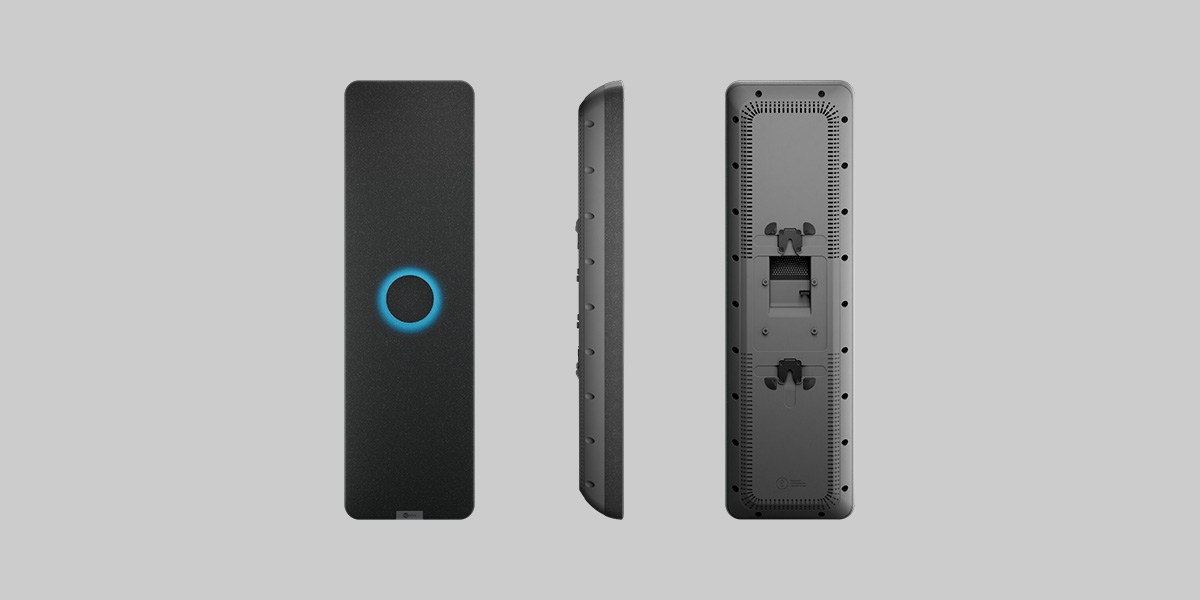
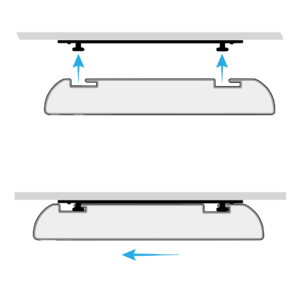
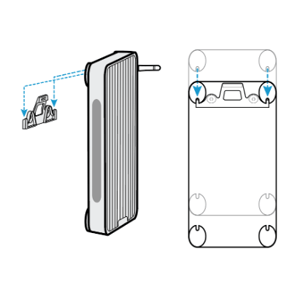
6. Attach the microphone pod Align the connection points on the bottom of the microphone pod with the posts on the mounting bracket. Slide the microphone pod into place until you hear it click. |
|
|
Tip: For extra security, thread the security wire through the small metal frame hole on the back of the microphone pod — located in the divot. |
|
|
7. Connect to system hub Connect the microphone pod to the system hub with the Ethernet cable. |
 |
Wall mounting
|
1. Plan the mounting location Choose a suitable spot on the wall for optimal audio pickup. |
 |
|
2. Mark for installation Position the mounting bracket on the wall and mark the hole positions with a pencil or pen. |
|
|
3. Mount the bracket Drill the marked holes, insert wall anchors and then position the mounting bracket and securely screw it to the wall. |
|
|
4. Route the Ethernet cable Run the Ethernet cable to the mounting area and plug it into the back of the microphone pod. Tip: For cleaner cable management, cables can be tucked and hidden behind the microphone pod. |
 |
|
5. Attach the microphone pod Align the connection points on the microphone pod with the posts on the mounting bracket. Slide the microphone pod into place until you hear it click.
|
|
|
Tip: For extra security, thread the security wire through the small metal frame hole on the back of the microphone pod — located in the divot. |
|
|
6. Connect to system hub Connect the microphone pod to the system hub with the Ethernet cable. |
|


|
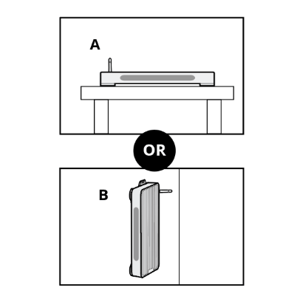
Choose a location A: Tabletop or shelf |
 |
|
A: Tabletop or shelf |
|
|
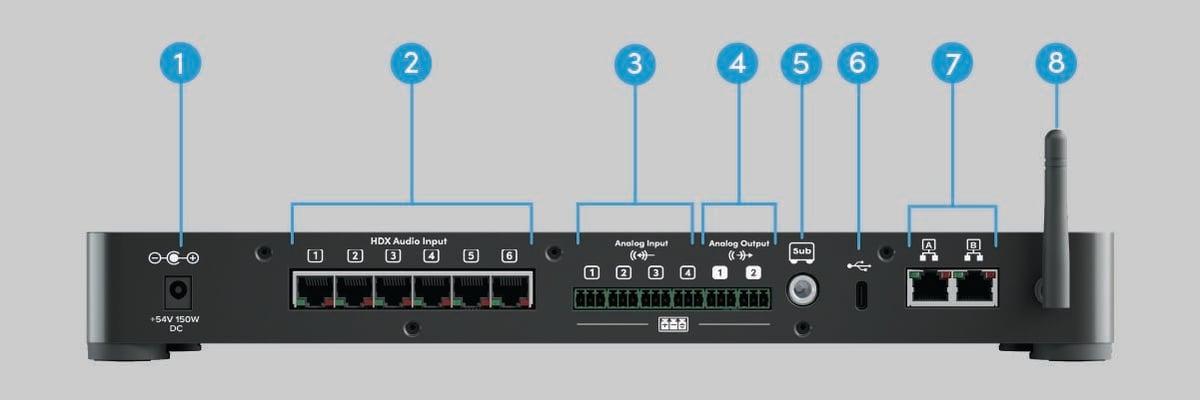
1. Attach the antenna to the back of the system hub.
|
|
|
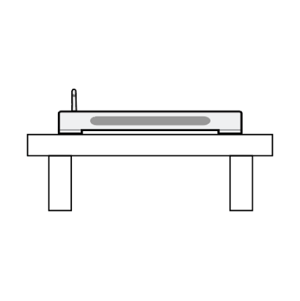
2. Place the system hub on a sturdy table or shelf. |
|
|
B: Wall mounted |
|
1. Hold the bracket in place at the desired wall location and mark the pilot holes. |
|
2. Drill the marked holes, insert wall anchors if needed, then securely screw the mounting bracket to the wall.
|
|
3. Attach the antenna to the back of the system hub. |
|
|
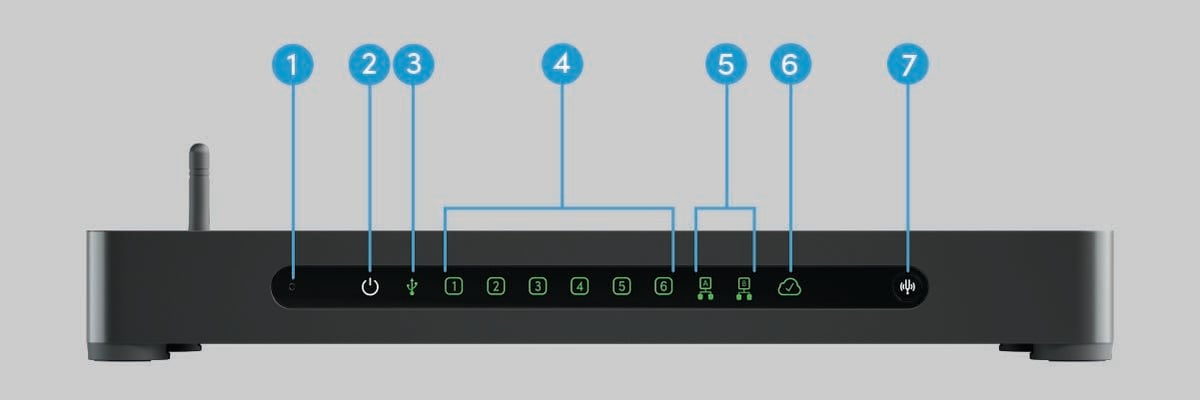
4. Clip the system hub to the mounting bracket. Ensure the antenna has enough clearance and the LED lights are facing forward. |
|

|
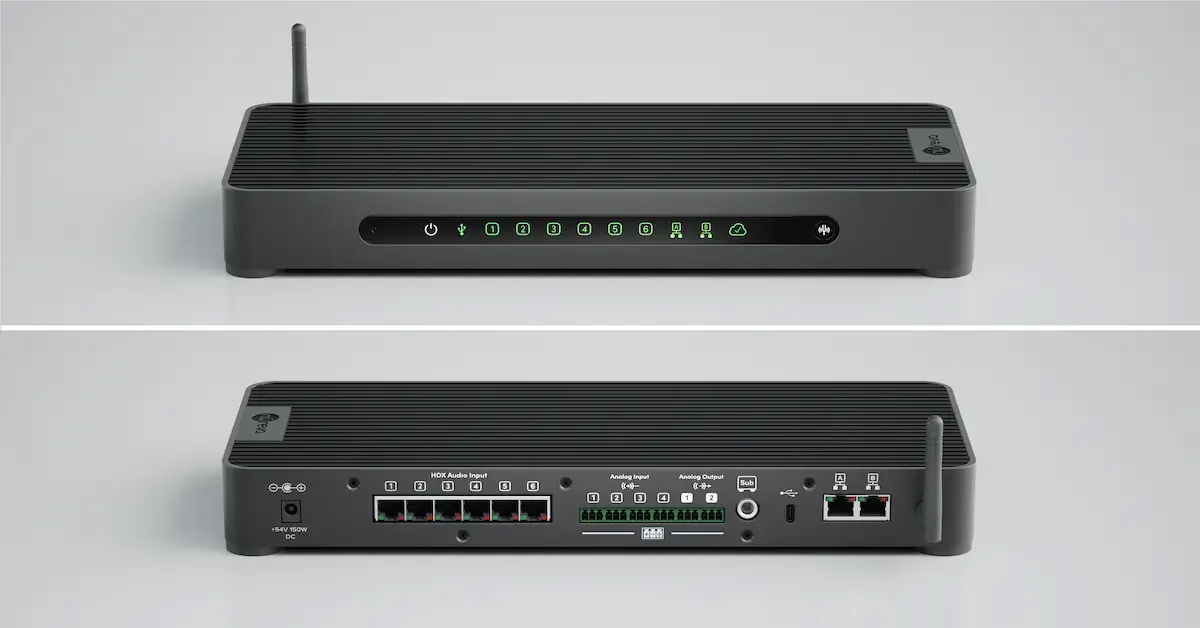
1. Connect the network cable
Note: If the HDX system hub is not connected to the network, updates must be done manually. |
 |
|
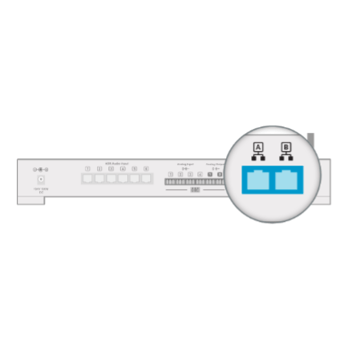
2. Connect the audio bars and (if applicable) microphone pods
|
|
|
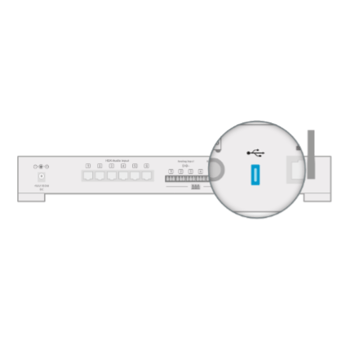
3. Connect the computer The HDX system can now be connected to a computer or a conferencing device:
A USB-C to USB-A adapter is included. |
|
|
It is recommended that all HDX components be physically installed in the room before connecting the system to power. |
|
|
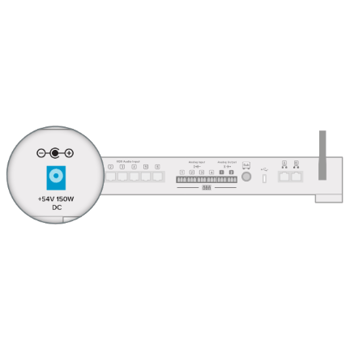
4. Connect the power supply and calibration will start Warning: Do NOT plug or unplug the audio bars or microphone pods from the system hub, or unplug the cable from the audio bar or microphone pod itself, while the system hub is powered on. Doing so could irreparably damage the system. |
|
|
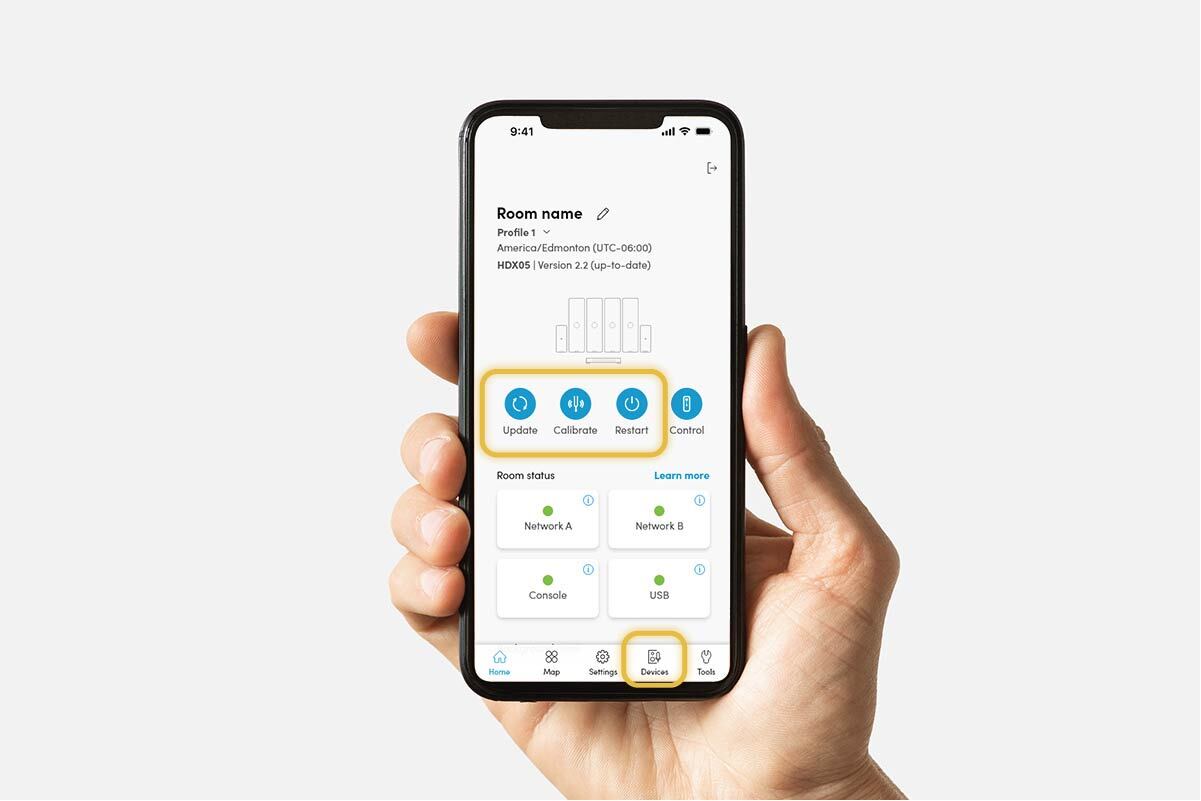
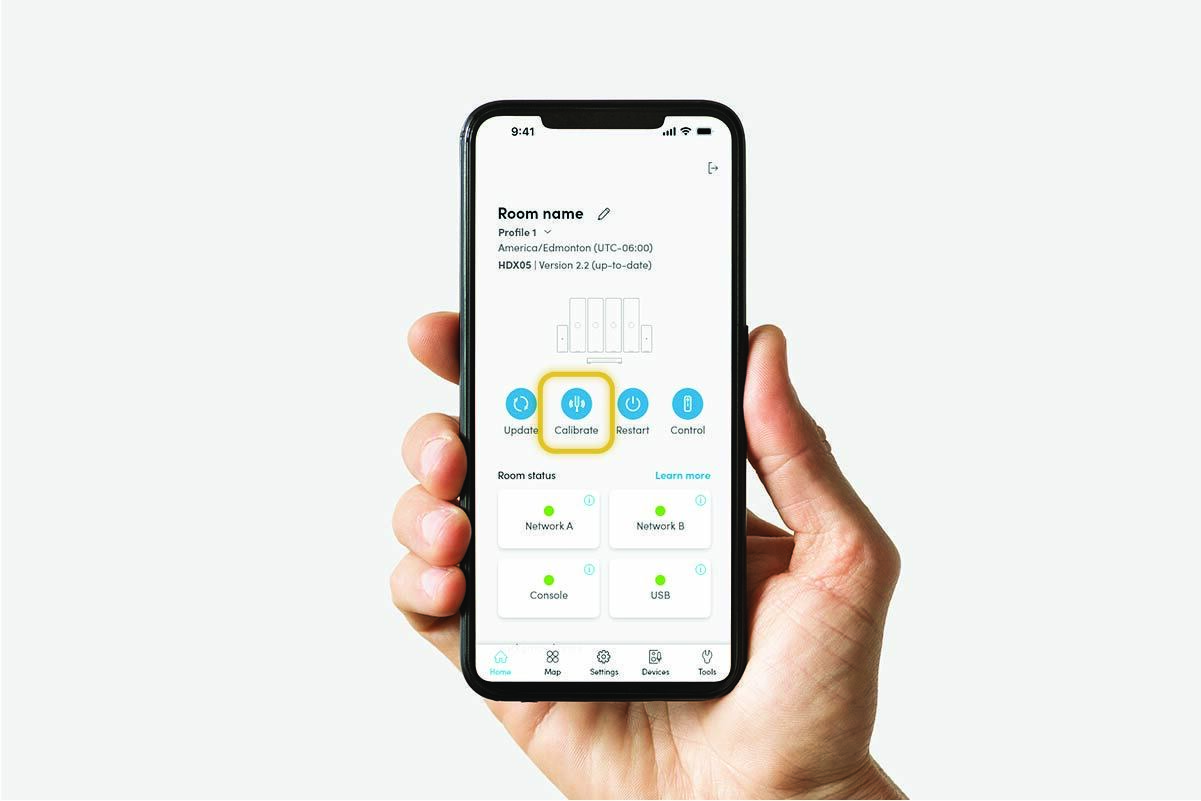
Warning: The HDX system will begin an automatic calibration sequence as soon as it’s connected to power. This calibration sequence can be loud. We recommend covering your ears or using hearing protection. Note: If the system hub was powered prior to installation of all components, another calibration will be required after they’re installed. To calibrate the HDX system, press the calibrate button on the front of the system hub. |
|


Calibration
HDX automatically runs a calibration sequence the first time it’s switched on, so all components should be fully installed before connecting the system to power.
Note: If the system is switched on prior to installation, another calibration will be required after it is installed.
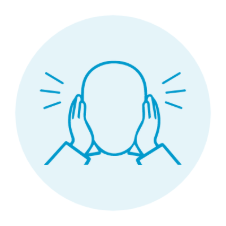
Warning: Calibration produces loud sounds for about 45 seconds. Ensure the room is quiet and cover your ears or consider using hearing protection.
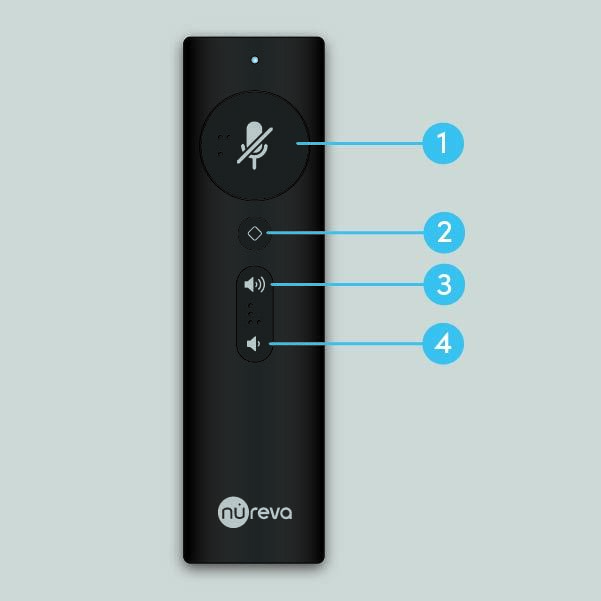
You can use the calibrate button on the front of the system hub to quickly optimize audio when the room setup or furniture placement has changed significantly.

|
|
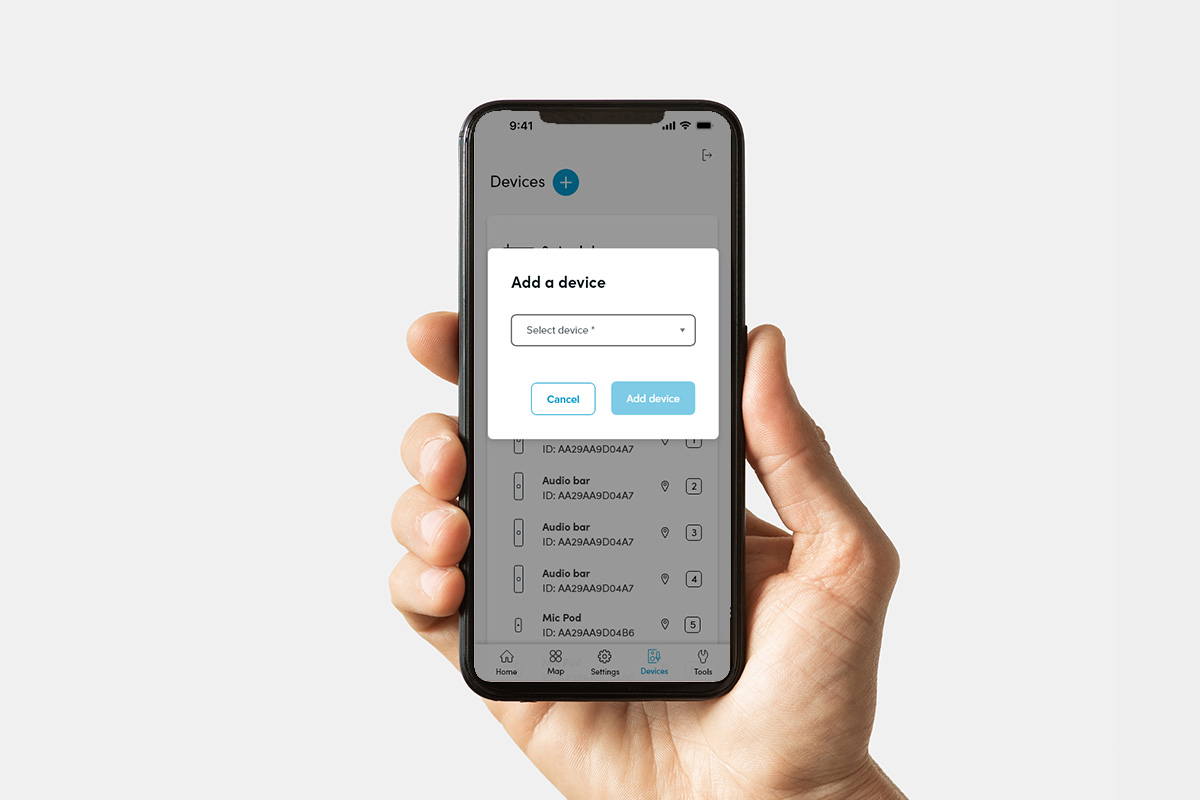
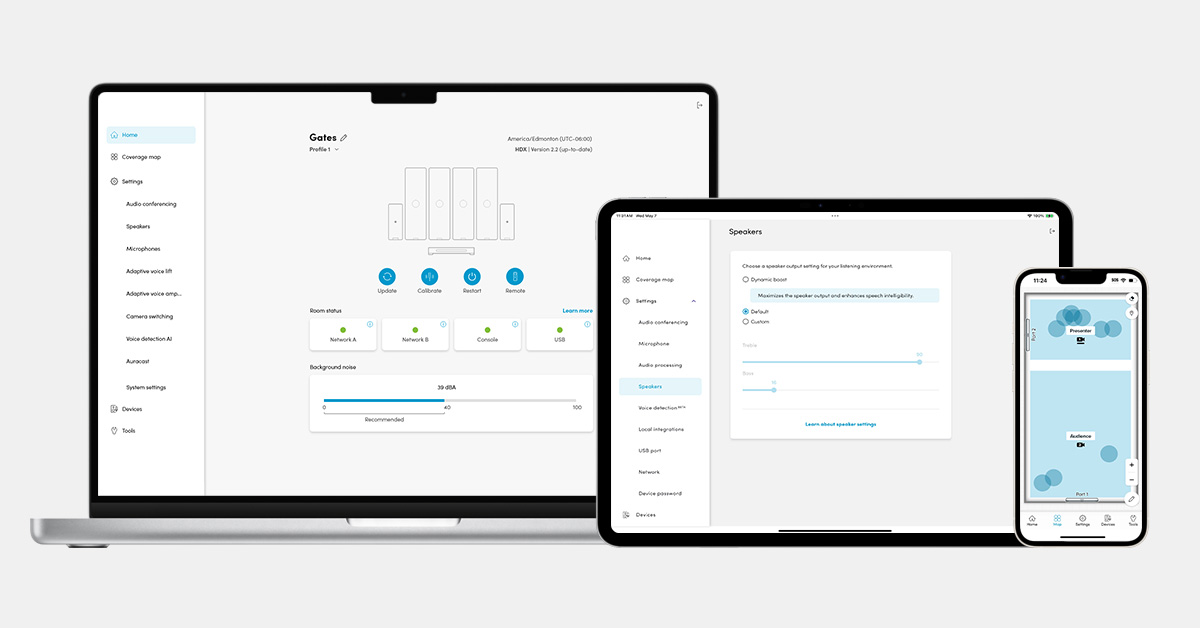
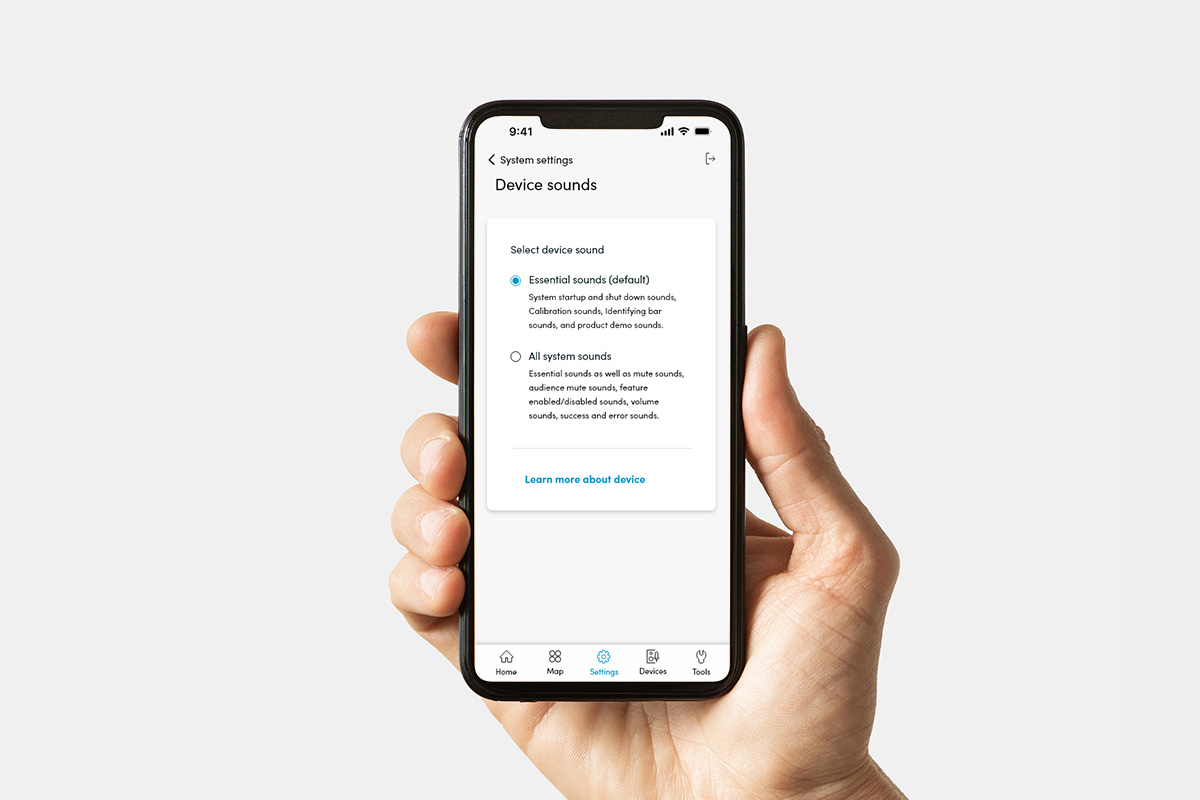
1. Sign up Enter your email address and details to create your account. 2. Enter code Enter your code. This can be found on the bottom of the system hub (XXX-XXX-XXX). 3. Manage Manage and monitor your devices from anywhere. |
|
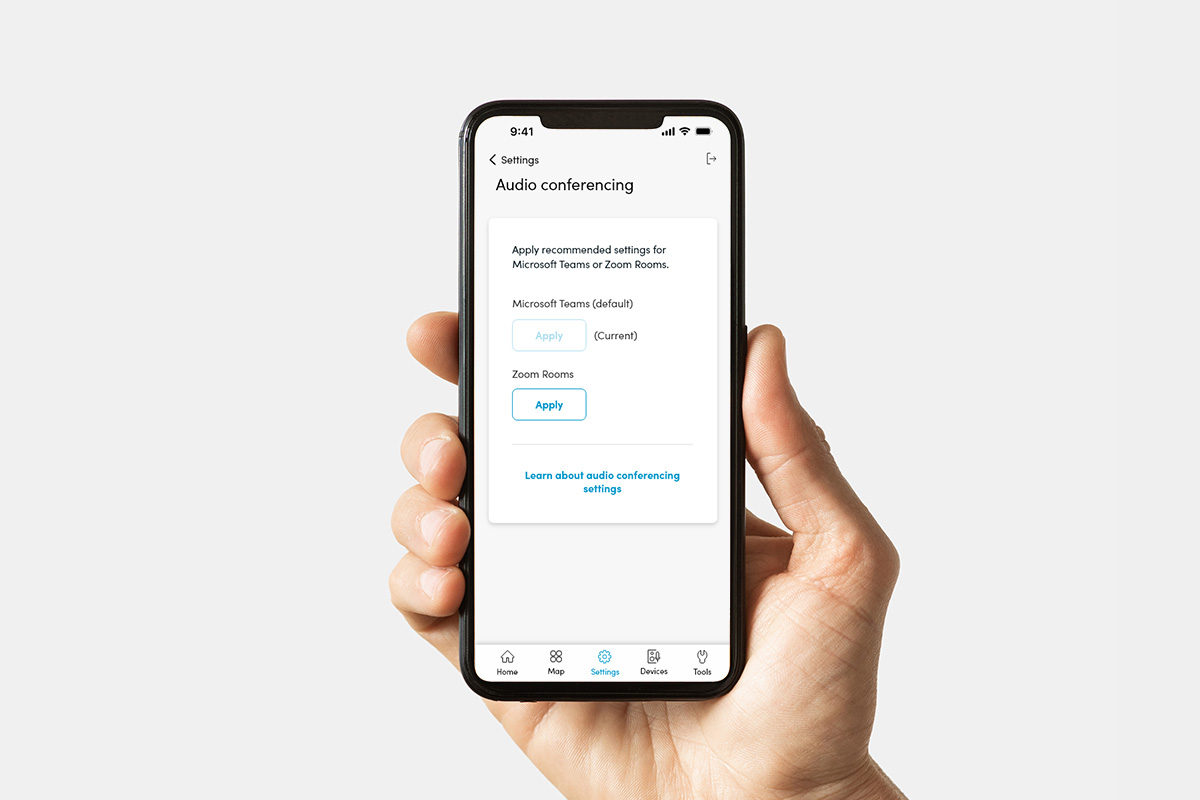
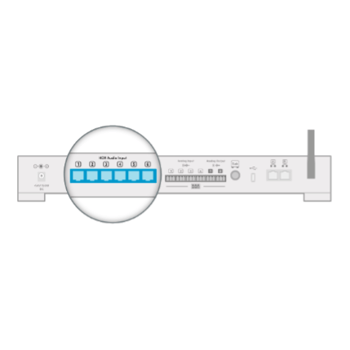
These 3-pin connectors are for balanced (differential) signals (positive, negative and ground). These inputs and outputs can be configured in the Nureva App or Nureva Console when adding a device. |
[Image description: Euroblock connectors] |